Pruning is essential when we think about overall tree care and maintenance. Pruning removes branches that are less than desirable, such as those that are broken, damaged, diseased, or dead. By removing structurally unsound branches early on, we reduce the risks of tree problems or branch failure as the tree matures. With a little bit of skill and knowledge of how to properly prune, you can safely and effectively prune your street tree.
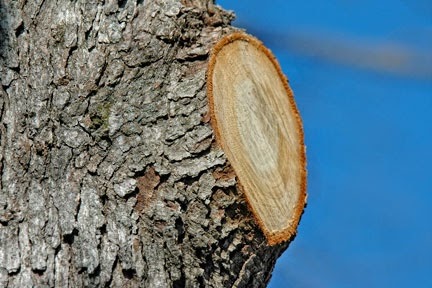
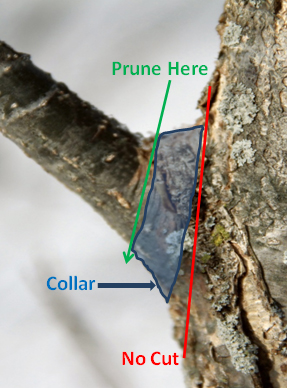
For young or small branches, you can use bypass pruning shears to quickly snip off the branches. A properly formed branch will have both a branch collar and a branch bark ridge. The branch bark ridge is a line of bark that aids in connecting the branch to the trunk. It is a raised ridge near the branch bark collar, and should be left intact when making a pruning cut. The branch collar, a round nub that connects the branch to the trunk or to a larger branch, should also be located. It is very important to locate the branch collar before making a pruning cut. Flush cuts, or pruning cuts that remove the branch collar and cut into the trunk, can severely damage your tree. Once the branch collar is located, cut in the space before the branch collar forms. You should cut outside of the branch collar, leaving it intact and still connected to the tree. A pruning cut done correctly will look like a small rounded bump connected to the trunk of the tree, with both the branch bark collar and branch bark ridge left behind. After the pruning cut is made, the tree should be able to seal over the cut and protect itself. If the branch collar is not left intact, the tree will not be able to seal over properly and will be left vulnerable to pests and disease.
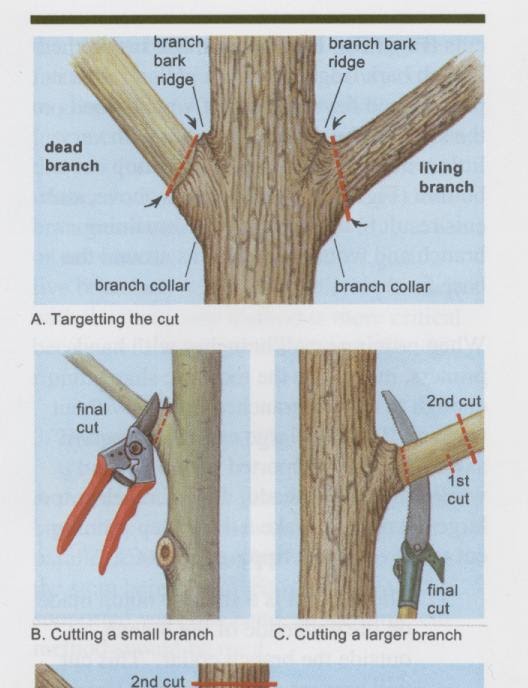
For larger branches, you will need a hand saw. There are several steps to take to remove the branch. With larger branches, there’s a risk of the weight of the branch tearing off bark or causing a wound if you simply cut through the wood. Luckily, there’s a simple 3-step process to remove the branch safely and effectively without damaging the tree:


Making a correct pruning cut is critical for the health and care of your tree. With a few simple steps, you too can make safe pruning cuts to help shape and protect your tree. Remember: you can remove dead, diseased, or damaged branches any time of year. If you notice conflicting branches or want to prune for aesthetics, you should wait until winter, when the leaves have fallen and the tree is dormant. Keep track of how much wood you are removing from the tree. No more than ¼ of the tree’s canopy should be pruned off per year. Have fun, stay safe, and enjoy your nicely pruned tree!